Your back is the largest muscle group in your upper body, and it’s also the one most people struggle to actually feel working. Machines fix much of that. They lock you into a groove so your lats and mid-back do the job instead of your lower back or your grip tapping out first.
Below are the six gym machines I reach for most when I’m training back, what each one hits, how to set it up, and where it earns a spot in your session. A couple build width, a couple build thickness, and one is there purely for your lower back.
Machines won’t replace heavy rows and deadlifts for building a thick back. But for isolating the lats or rowing hard with your chest supported, they beat a barbell, and you can push close to failure without a spotter. If you’re putting together a full machine session, we’ve also covered the best gym machines for legs and the best gym machines for chest.
Table of Contents
- 1 The Best Gym Machines for Back
- 2 Anatomy of Back Muscles
- 3 Key Takeaways
- 4 FAQs
- 5 Other Alternative Exercises
- 5.1 The 10 Best Romanian Deadlift Alternatives
- 5.2 The 10 Best Hack Squat Alternatives
- 5.3 The 7 Best Deadlift Alternatives
- 5.4 The 10 Best Glute Bridge Alternatives
- 5.5 The 10 Best Lat Pulldown Alternatives
- 5.6 The 10 Best Overhead Press Alternatives
- 5.7 The 10 Best Leg Extension Alternatives
- 5.8 The 12 Best Pull-Up Alternatives
- 5.9 The 10 Best Bulgarian Split Squat Alternatives
- 5.10 The 9 Best Seated Cable Row Alternatives (2026)
- 5.11 The 8 Best Decline Bench Press Alternatives
- 5.12 The 10 Best Front Squat Alternatives
- 5.13 The 10 Best Pallof Press Alternatives
- 5.14 The 9 Best Barbell Row Alternatives
- 5.15 The 10 Best Bent Over Row Alternatives
The Best Gym Machines for Back
- Cable Machine
- Chest-Supported T-Bar Row Machine
- Assisted Pull Up Machine
- Back Extension Bench
- Lat Pulldown Machine
- Seated Row Machine
Cable Machine
The cable machine is the most versatile thing on this list. Swap the attachment and the pulley height and you can train just about every back muscle from your lats down to your lower traps, all with constant tension that free weights lose at the top and bottom of a rep. It also made it onto our list of the most effective upper body machines.
Set the pulley low and row to your waist and it loads the same mid-back the barbell version does. If you want the free-weight take on that pattern, our bent-over row alternatives cover it.
Benefits of the Cable Machine
- Tension stays on the muscle through the whole range, top to bottom, which a dumbbell or barbell can’t match.
- One machine covers rows, pulldowns, face pulls, and pullovers, so you can train width and thickness without moving stations.
- The fixed line of pull holds your position for you, which matters most when your back is fried and your technique starts to slip.
- It’s easy on the joints, so you can run higher reps without your elbows or shoulders complaining.
Tips for the Cable Machine
- Keep the weight where you can still control the way down. Chasing the stack and yanking the cable turns it into a momentum exercise.
- Set the pulley for the job: low for rows, high for pulldowns and face pulls.
- Give yourself room. The cable needs floor space behind it to run the full range.
- Don’t sleep on cable face pulls for your rear delts and mid-traps. They’re in our 7 best middle trap exercises.
How to use the Cable Machine
The cable does a lot, but if you only run one back exercise on it, make it the row.
- Set a low pulley and attach a close-grip handle. Sit or stand facing the stack with a slight bend in your knees and your chest tall.
- Grab the handle, brace your core, and pull your shoulder blades down and back before your arms start to move.
- Row the handle to your belly button, leading with your elbows and keeping them close to your sides.
- Squeeze your mid-back for a beat, then let the handle travel back under control until your arms are straight and your shoulder blades stretch forward.
- Repeat without letting the weight pull your torso forward.
Mind Pump TV breaks down how to row on the cable properly in the video below:

Chest-Supported T-Bar Row Machine
The chest-supported T-bar row is my favorite machine for building back thickness. Lying face-down against the pad takes your lower back and your balance out of the equation, so every bit of effort goes into rowing instead of holding yourself up. That’s how you actually overload the mid-back.
It’s a compound row, so it trains much of the back at once:
- Rhomboids
- Trapezius
- Latissimus dorsi
- Rear deltoid
If you want to zero in on the rear delts, here are the 6 best cable rear delt exercises. And if your gym doesn’t have the machine, our T-bar row alternatives cover the landmine and free-weight ways to get the same work in.
Benefits of the Chest-Supported T-Bar Row Machine
- The chest pad removes lower-back fatigue, so you can load it heavy and keep your form tight even on the last rep.
- With balance taken out of it, the work goes straight to your lats and mid-back instead of your stabilizers.
- All that rowing volume carries over to better posture and a stronger pull on deadlifts.
- It’s simple to add weight session to session, which is what you need to keep growing.
Tips for the Chest-Supported T-Bar Row Machine
- Keep your shoulder blades retracted the whole rep. Roll the shoulders back and squeeze the blades together.
- Don’t drop the weight at the bottom. Lower it slowly and you’ll get far more out of every set.
- Start lighter than you think. The supported position lets you load more than your form is ready for at first.
- Lead with your elbows, not your hands, to keep the tension on your back rather than your biceps.
How to use the Chest-Supported T-Bar Row Machine
- Place your feet on the platform and lie your chest on the upper pad. Adjust the platform so the top of your chest sits just above the padding.
- Grab the handles with your palms facing down or in, whichever your gym’s machine allows.
- Keep your legs slightly bent to take the stress off your back, and look down to keep your neck neutral.
- Pull the bar up toward your chest as high as it’ll go, then pause and squeeze your shoulder blades together.
- Lower the bar under control until your arms are straight, and repeat.
The following video walks through how to set up the chest-supported T-bar row machine and run the movement properly:

Assisted Pull-Up Machine
The assisted pull-up machine is how you build toward real pull-ups without burning out before you’ve trained anything. It counterbalances your bodyweight, so you choose how much help you get and grind out clean reps instead of kipping and swinging your way over the bar.
It works most of the pulling muscles in one go:
- Trapezius
- Latissimus Dorsi
- Forearms
- Biceps
- Core
- Shoulders
- Erector Spinae
For the full breakdown, check out our guide on pull up muscles worked. Once you can do a few unassisted, or if your gym doesn’t have the machine, our pull-up alternatives give you other ways to build the same pulling strength.
Benefits of the Assisted Pull-Up Machine
- It’s the best on-ramp for anyone who can’t yet do a bodyweight pull-up.
- With less load to fight, you can focus on form on a lift most people butcher.
- Dialing back the assistance over time is a clear, measurable path to your first real pull-up.
- You can hit a full range of motion every rep instead of stalling halfway up.
Tips for the Assisted Pull-Up Machine
- Think of pulling your elbows down toward your sides rather than flaring them out. It keeps the work on your back.
- Brace your core and keep your hips in line with your shoulders so you don’t swing.
- Remember the resistance is backwards: more weight on the stack means more help, so chase a lower number as you get stronger.
- Lower yourself slowly until your arms are straight. The way down builds as much strength as the way up.
How to use the Assisted Pull-Up Machine
- Set the resistance. The higher the weight, the more help you get and the easier the pull-up.
- Standing on the plates, use the lower handles to pull yourself onto the knee pad, one knee at a time.
- Let the pad settle, keep the tension in your arms, and lower yourself until your arms are straight overhead.
- Pull yourself up using the handles, keeping your hips under your shoulders, and aim to get your chin above your hands.
- Lower yourself back down slowly until your arms are straight again, and repeat.
This video gives a clear walkthrough of how to set up the assisted pull-up machine and run the movement:

Back Extension Bench
The back extension bench is the one machine here that’s about your lower back rather than your lats. It uses your own bodyweight to load the erectors, glutes, and hamstrings through a hip hinge, and it’s about as low-impact as posterior-chain work gets.
It trains the following muscle groups:
- Erector spinae
- Quadratus lumborum
- Hamstrings
- Glutes
- Core
Used properly, the back extension bench can help if you struggle with lower back pain, since it strengthens and stretches the muscles that support your spine.
Benefits of the Back Extension Bench
- It loads the lower-back erectors directly, which almost nothing else on this list does.
- Stronger erectors and a braced core mean better posture and less slouching.
- Building the muscles around your spine can take pressure off it and cut your risk of nagging back pain.
- It’s bodyweight to start, so it’s low-impact and easy to learn before you add load.
Tips for the Back Extension Bench
- Keep the movement controlled. No jerking, no bouncing out of the bottom.
- Don’t hyperextend at the top. Come up to a straight line and stop there rather than arching back hard.
- Once bodyweight gets easy, hold a plate against your chest to keep progressing.
- Go slow and steady, especially on the way down.
How to use the Back Extension Bench
- Set your feet on the bottom plate with the back of your calves against the lower pads.
- Lower onto the upper pads with your thighs firmly in place. Your hips should sit just above the upper pads so you can hinge freely.
- Lower your upper body while keeping your back straight, then contract your lower back and glutes to pull yourself back up to the starting position.
- Repeat for your target reps, keeping every rep slow and controlled.
If you’re a beginner, this video covers the right position and how to run the movement without straining your lower back:

Lat Pulldown Machine
If width is what you’re after, the lat pulldown is the machine to live on. It trains the same vertical pull as a pull-up but lets you load it precisely and swap grips to bias different parts of the lats, which makes it the easiest place to pile on back volume.
It works the following muscle groups:
- Latissimus dorsi muscles
- Biceps
- Rhomboids
- Rear Deltoids
Want to keep that vertical-pull stimulus with different equipment? See our lat pulldown alternatives.
Benefits of the Lat Pulldown Machine
- It’s the most direct way to build lat width without needing to do full pull-ups.
- The setup is simple and the movement is easy to learn, so it’s beginner-friendly.
- It’s low-impact, which keeps your risk of injury and back pain down.
- Changing grip width shifts the emphasis: a narrow grip hits the inner lats, a wide grip the outer lats.
Tips for the Lat Pulldown Machine
- Sit tall with your shoulders down, feet flat, and back straight. Don’t lean way back and turn it into a row.
- Pull your shoulder blades down and back before your arms move to fire the lats first.
- Try different grip widths to hit the inner and outer lats.
- Control the bar back up instead of letting it yank your arms straight.
How to use the Lat Pulldown Machine
- Sit facing the machine and make sure your chosen handle is securely attached to the cable above you. Tuck your thighs under the pads.
- Reach up and grip the handle with your hands about shoulder-width apart, or wider to bias the outer lats.
- Pull the handle down toward the top of your chest, squeezing your shoulder blades together to drive the lats.
- Release the handle slowly and let it rise back up until your back muscles stretch at the top, then repeat.
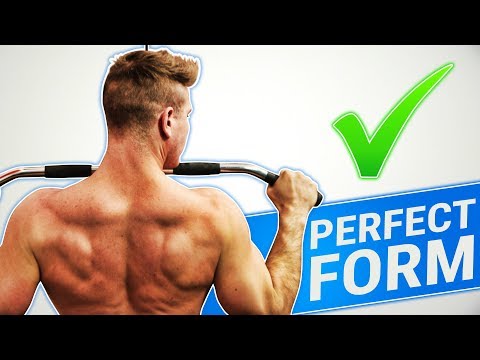
The following video covers body position, grip, and machine setup for the lat pulldown:
Seated Row Machine
The seated row machine is the counterpart to the lat pulldown. Where the pulldown builds width, this builds thickness through your mid-back. The chest pad braces your torso so you can row heavy without your lower back limiting you, which is exactly why I program it.
It works the following muscles:
- Rear Deltoids
- Trapezius
- Forearm Muscles
- Core Stabilizers
- Rhomboids
- Latissimus Dorsi
For more rowing variations that train the same muscles, see our cable row alternatives.
Benefits of the Seated Row Machine
- It’s one of the best machines for building mid-back thickness.
- The chest pad supports your torso, so the arms and back do the work and your posture stays clean.
- The movement is simple, which lets you focus on breathing and bracing.
- It’s easy to add weight as you get stronger.
Tips for the Seated Row Machine
- Keep your head neutral and your shoulders down. Don’t scrunch them up toward your ears.
- Keep your back straight throughout. The chest pad helps, and bracing your core pulls the back up with it.
- Pull from your elbows rather than your biceps to keep the tension on your back.
- Start with a lower weight and build up once your form is dialed in.
How to use the Seated Row Machine
- Adjust the seat height so your shoulders line up with the top handles, then set the chest pad so you can reach the handles with your arms fully extended.
- Select a weight.
- Put your feet on the foot pads and take the handles in a neutral grip.
- Keeping your core tight and shoulders down, pull the handles to the sides of your body and squeeze your back. Keep your elbows close to your sides on the way back.
- Return the handles to the starting position under control, then pull again for as many reps as you need.
This quick video can help you dial in your form so you’re pulling the weight with your back:

Anatomy of Back Muscles
Your back muscles are what keep your spine stable and your torso supported. They handle a few different jobs:
- Shoulder movement: Some of the back muscles drive movement at the shoulders, including rotation, retraction, and abduction.
- Spinal stabilization: All the back muscles, wherever they sit, work together to support the spine. That’s what holds your posture and helps prevent injuries.
- Spinal extension: Many back muscles help extend the spine, which is what lets you arch your back and stand up straight.
Superficial Muscles
The superficial muscles let you shrug, move your arms, and keep your spine straight. They include:
- Levator scapulae: Located in the upper back and neck, this muscle raises your shoulder blades.
- Lats (Latissimus dorsi): This muscle starts just under the shoulder blade and runs down the side to just above the hip. It rotates and extends your shoulders and arms.
- Rhomboids: Two muscles that pull the scapula toward your spine.
- Traps (Trapezius): Help your posture, move your torso, and raise your arms. Here are some good lower trap exercises.
Intermediate Muscles
The serratus posterior superior and serratus posterior inferior make up the intermediate muscles.
They sit between your shoulder blades and help you breathe. Both attach to the ribs and assist with contracting and expanding the chest.
Intrinsic Muscles
There are two groups here, the transversospinalis group and the erector spinae group, each made up of smaller muscles. They do the same job: they let you extend, bend, flex, and rotate your back.
Key Takeaways
Pick the machine that matches what you’re trying to build. For lat width, the lat pulldown is the one to anchor your back day around. For mid-back thickness, the seated row machine and the chest-supported T-bar row are the heavy hitters, and the T-bar wins when you want to push real weight with your chest fully supported. For your lower back, the back extension bench is the only machine here that loads the erectors directly. And if you’re still new to pulling, spend time on the assisted pull-up machine and the cable to clean up your form before you start loading the rowing machines.
FAQs
Back muscles are like all other muscles in the body. You can work on them three times a week with at least one rest day in between. For more specific guidance regarding back training frequency, check out Renaissance Periodization’s back growth training tips.
It’s best to keep it light. You can start with 6-8 reps of your desired back exercise with a low weight. You can increase slowly as your back muscles become used to the movements and repetitions.
Yes. Stretching is essential before using any of the best back workout machines. You need to get your back muscles loose and flexible to help you improve your range of motion.
Other Alternative Exercises
If you enjoyed this post, check out our other roundups of the best alternatives for other exercises.