The bent-over barbell row is one of the best barbell pull exercises for building a thick, strong back. It hits nearly the whole posterior chain in one shot: lats, rhomboids, traps, teres major and minor, erectors, even your hamstrings and glutes, plus your biceps, forearms, and core along the way.
As much as I like the barbell row, it isn’t the right pick for everyone. The big drawback is lower-back stress. The heavier you go, the harder it is to hold position, and a rounded back under load is how people get hurt. It’s also a bilateral barbell lift, so if one side is stronger than the other or you don’t own a barbell, you’re stuck.
That’s where this list comes in. Whether you want a dumbbell bent over row alternative you can do at home, a bent over row machine alternative that takes your lower back out of it, or just a barbell row alternative that fits the equipment you’ve got, there’s something here for you. If cable setups are more your thing, our cable row alternatives cover those too.
I picked these 10 on how well they build the back, how much they spare your lower back, what equipment they need, and whether you can keep loading them over time. Here’s the full list, then I’ll break down each one: why it made the cut, how to do it, and a few cues to get it right.
Table of Contents
- 1 The 10 Best Bent Over Row Alternatives
- 2 Reasons to Choose a Bent-Over Row Alternative
- 3 Muscles Worked by the Bent-Over Row
- 4 Bent-Over Row Alternatives: FAQs
- 5 Key Takeaways
- 6 Other Alternative Exercises
- 6.1 The 12 Best Pull-Up Alternatives
- 6.2 The 9 Best Leg Press Alternatives
- 6.3 The 8 Best Ab Rollout Alternatives
- 6.4 The 8 Best Tricep Dip Alternatives
- 6.5 The 8 Best Hammer Curl Alternatives
- 6.6 The 10 Best Lying Leg Curl Alternatives
- 6.7 The 10 Best Box Jump Alternatives
- 6.8 The 9 Best Lunge Alternatives
- 6.9 The 10 Best Overhead Press Alternatives
- 6.10 The 10 Best Glute Bridge Alternatives
- 6.11 The 8 Best Decline Bench Press Alternatives
- 6.12 The 10 Best Dumbbell Pullover Alternatives
- 6.13 The 9 Best Barbell Row Alternatives
- 6.14 The 9 Best T-Bar Row Alternatives
- 6.15 The 10 Best Romanian Deadlift Alternatives
The 10 Best Bent Over Row Alternatives
- Single-Arm Dumbbell Rows
- Chest-Supported Machine Row
- T-Bar Row
- Pendlay Row
- Inverted Row
- Incline Dumbbell Row
- Suspension Trainer Rows
- Meadows Row
- Band Rows
- Lat Pulldowns
1. Single-Arm Dumbbell Rows
When to Perform Single-Arm Dumbbell Rows
The single-arm dumbbell row is my go-to dumbbell bent over row alternative, and the first thing I reach for when someone has a side-to-side imbalance. Working one arm at a time lets your weaker side set the pace so the stronger one can’t carry it. All you need is a dumbbell, and bracing one hand on a bench takes most of the load off your lower back.
Set up standing with your free hand on a bench or a dumbbell rack, or put a knee and hand on a flat bench. Pull the dumbbell back toward your hip to bias the lat, or straight up to hit more of your mid and upper back.
Since the single-arm dumbbell row is a compound movement, run it near the start of your back day. No dumbbells? A kettlebell works just as well, and it’s one of the better compound dumbbell exercises for your back either way.
How to Perform Single-Arm Dumbbell Rows
- To do this exercise, you’ll need a dumbbell and a flat or adjustable bench.
- Grab a dumbbell with your left hand using a neutral grip.
- Bend your right knee and place it on a flat bench, lean forward, and place your right hand on the bench for more support. Look straight down to maintain a neutral spine throughout the movement.
- Plant your right foot on the floor and allow the dumbbell to hang down toward the floor.
- Take a deep breath, brace your core, and before you pull the dumbbell toward you, retract your left shoulder blade.
- Pull the dumbbell up toward your hip. Focus on driving with your elbow.
- Once the dumbbell touches your hip or torso, pause for 1-2 seconds.
- Slowly lower the dumbbell back to the starting position.
- Repeat for the desired number of reps, then switch arms.
Check out the video below from Scott Herman to see how to do a single-arm dumbbell row correctly.

Tips for Single-Arm Dumbbell Rows
- Run it standing with your free hand on a support like a dumbbell rack, or half-kneeling with your knee and hand on a flat bench.
- If your grip gives out before your back, use lifting straps.
- Start with your weaker side and match the weight and reps on your stronger side.
2. Chest-Supported Machine Row
When to Perform the Chest-Supported Machine Row
This is the bent over row machine alternative I’d hand anyone whose lower back gives out before their back muscles do. With your chest and hips pinned to a pad, there’s next to no load on your lumbar spine, so your upper and mid back become the limiting factor instead of your core or erectors.
Most machines let you pick a pronated or neutral grip. Pronated leans on the upper and mid back, neutral brings in more lat. You can run it anywhere in a back or upper-body session, and if one side lags, plenty of machines let you row one arm at a time.
How to Perform the Chest-Supported Machine Row
- You’ll need a chest-supported row machine. Set the seat and chest pad so the handles line up with the middle of your chest and your feet are planted.
- Sit down, press your chest and stomach into the pad, and grab the handles with a pronated or neutral grip.
- Let your arms extend fully and feel a stretch across your back.
- Brace your core, retract your shoulder blades, and drive your elbows back to pull the handles toward your torso.
- Once the handles reach your torso, pause for 1-2 seconds and squeeze your back.
- Slowly extend your arms to return to the starting position.
- Repeat for the desired number of repetitions.
Watch the video below from Renaissance Periodization to see how to do a chest-supported machine row with proper form.

Tips for the Chest-Supported Machine Row
- Keep your chest on the support pad the whole set.
- Drive your elbows back as far as you can.
- If you’ve got a strength imbalance, row one arm at a time when the machine allows it.
3. T-Bar Row
When to Perform the T-Bar Row
The T-bar row is the one I point people to when their barbell row has stalled. The setup is almost identical, but your hands sit in a neutral position instead of pronated, and you stay a touch more upright, which can take some pressure off your lower back.
Your torso isn’t braced against anything, so your core, erectors, hamstrings, and glutes still have to hold you in place. The old-school close-grip version was a bodybuilding staple for adding thickness to the whole back. It’s on the demanding side, so do it early in your session. For more on what it trains, see our breakdown of the T-bar row benefits and muscles worked.
Some gyms have a dedicated T-bar row setup, but you can run it with just a barbell, a close-grip V-bar attachment, plates, and a landmine. You can also wedge the end of the barbell into the corner of a squat rack or a wall.
How to Perform the T-Bar Row
- To do this exercise, you’ll need an Olympic barbell, plates, and a close-grip V-bar. A landmine is useful but not necessary.
- Place one end of the barbell in the landmine or the corner of a squat rack. On the other end, load an appropriate amount of weight.
- Grab a close-grip V-bar and step over the bar so the barbell is between your legs.
- Assume a wide stance with your toes pointed forward. Hinge your hips back, bend your legs, and lean slightly forward with your chest up.
- Hook the close-grip V-bar underneath the barbell near the collar and reach down to grab the bar with a neutral grip. Your arms should be straight.
- Lift the barbell slightly off the ground while keeping a neutral back and straight arms.
- Take a deep breath, brace your core, retract your shoulder blades, then pull the bar to your torso by driving with your elbows.
- At the top of the rep, pause for 1-2 seconds and focus on squeezing your back.
- Exhale as you slowly return the barbell to the starting position by extending your arms.
- Repeat for the desired number of repetitions.
In the video below, Mind Pump’s head trainer demonstrates how to do T-bar rows the right way.

Tips for the T-Bar Row
- Use a close-grip V-bar attachment.
- Swap the 45 lb plates for 25 lb plates. The smaller diameter gives you a longer range of motion.
- Keep your torso fixed. Don’t swing the weight by rocking forward and back.
4. Pendlay Row
When to Perform the Pendlay Row
If you want to build power and explosiveness while sparing your lower back, the Pendlay row is a great barbell row alternative. It looks like a barbell row, but the bar starts and resets on the floor between every rep.
This compound back movement is meant to be a more explosive take on the bent-over row, so it’s a strong fit for athletes training their fast-twitch fibers. The dead stop also makes it much harder to cheat with momentum than a standard barbell row. Curious how they stack up? Our Pendlay row vs barbell row comparison lays it out.
The Pendlay row asks for more range of motion, mobility, stability, and power than most row variations, so do it near the start of your back or upper-body day.
How to Perform the Pendlay Row
- To do this exercise, you’ll need an Olympic barbell, Olympic plates, and weight clips.
- Load an appropriate amount of weight on the barbell and secure the weight clips.
- The barbell should be resting on the floor. A deadlift platform and bumper plates are ideal but not necessary.
- Step up to the barbell and assume a shoulder-width stance with your toes pointed slightly out. The barbell should sit directly above your midfoot.
- Hinge your hips back, slightly bend your knees, and lean forward while keeping a neutral spine. Reach down to grab the barbell with a pronated grip just outside shoulder width.
- Take a deep breath, brace your core, and engage your lats by retracting and depressing your shoulder blades. Then pull the barbell toward the middle of your chest by driving your elbows back.
- Once the barbell touches your chest, exhale as you slowly lower it back to the floor.
- Let the barbell come to a complete stop before repeating for the desired number of repetitions.
Check out the video below from Scott Herman to see how to do a Pendlay row with proper technique.

Tips for the Pendlay Row
- Let the barbell come to a complete stop at the end of each rep.
- Don’t raise your torso to lift more weight.
- Keep your core tight and your lats engaged throughout.
- If your grip is the limiting factor, use lifting straps or chalk.
5. Inverted Row
When to Perform the Inverted Row
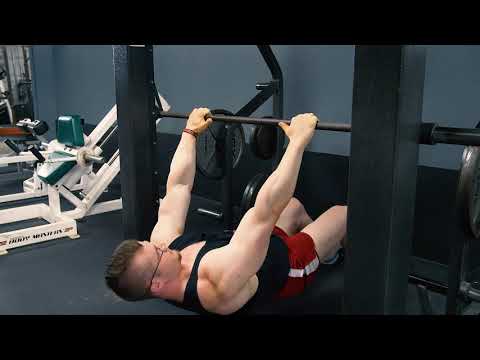
The inverted row is a great bent-over row alternative when your equipment is limited. All you need is a bar to hang under and your bodyweight, and you can dial the difficulty up or down just by changing your body angle.
The more horizontal you get, the harder it is; the more upright, the easier. Throw on a weighted vest once bodyweight stops being enough. Compared to a barbell row, it’s more forgiving on your lower back and leans toward your upper and mid back more than your lats.
You can run it on a barbell in a rack, a Smith machine, or rings, anywhere in a back or upper-body workout. For the full rundown, see our guide to the inverted row benefits and muscles worked.
How to Perform the Inverted Row
- Set a barbell or Smith machine to roughly waist height. The lower the bar, the harder the movement.
- Lie down on the floor, face up, and position yourself underneath the bar. The bar should be directly above the middle of your chest.
- Extend your arms up and out to grab the bar with a pronated grip slightly wider than shoulder width.
- Lift your back and hips off the ground by contracting your core and glutes, and extend your legs out so only your heels touch the floor. Your whole body should stay in a straight line throughout the movement.
- Take a deep breath, then pull yourself up to the bar by retracting your shoulder blades and driving your elbows back.
- Once your chest makes contact with the bar, pause for 1-2 seconds and focus on squeezing your back.
- Slowly return to the starting position by extending your arms and relaxing your shoulder blades.
In the video below, Jared Feather from Renaissance Periodization demonstrates how to perform an inverted row using a Smith machine.
Tips for the Inverted Row
- Touch your chest to the bar at the top of each rep.
- Raise or lower the bar to make it easier or harder.
- Keep your core tight throughout the movement.
6. Incline Dumbbell Row
When to Perform the Incline Dumbbell Row
An incline dumbbell row is the pick when you want to cut your lower back and core out of the equation and just isolate the back. Plenty of lifters load up the barbell row and heave it with momentum instead of their back muscles, which jacks up injury risk and does little for growth.
With your chest propped on the bench, cheating is off the table. So if you struggle to feel your back working on a row, this is where you build that mind-muscle connection. Dumbbells also give you a longer range of motion and let you switch grips: neutral for more lat, pronated for more mid and upper back. Run it early in your back session.
How to Perform the Incline Dumbbell Row
- To do this exercise, you’ll need a pair of dumbbells and an adjustable bench.
- Adjust the bench to a 45-degree or 60-degree angle. Set a pair of dumbbells next to the bench so you can easily grab them.
- Lay prone on the bench so your chest is fully supported but your head is slightly off.
- Let your arms hang straight down and grab the dumbbells with a neutral grip. They should hang just above the floor.
- Take a deep breath, then pull your shoulder blades back and down before driving with your elbows to pull the dumbbells toward your body.
- Once you feel a strong contraction in your back, pause for 1-2 seconds.
- Exhale as you slowly return the dumbbells to the starting position by extending your arms and protracting your shoulder blades.
- Once you feel a stretch in your back at the bottom, repeat for the desired number of repetitions.
Watch the video from Renaissance Periodization to see how to perform an incline dumbbell row correctly.

Tips for the Incline Dumbbell Row
- Use a neutral grip to target more lat, or a pronated grip to target more upper and mid back.
- An incline bench without a support beam down the middle works best so the dumbbells don’t hit it.
- At the top of the rep, lean back slightly and pull your elbows back as far as you can.
7. Suspension Trainer Rows
When to Perform Suspension Trainer Rows
Suspension trainer rows are close cousins of the inverted row, but you don’t need a bar or a Smith machine, just something solid to anchor to. That makes them perfect for travel, since you can get a real back workout out of a doorframe and a TRX.
Because the handles move independently, you get a longer range of motion than an inverted row, where the bar stops you at your chest. As with the inverted row, leaning back further makes it harder and standing taller makes it easier, and you can add a vest once bodyweight is too light.
They also build shoulder stability and go easy on your wrists since the handles rotate freely. Play with your grip to find what feels best, and slot them in anywhere in a back or upper-body day.
How to Perform Suspension Trainer Rows
- All you need is a suspension trainer and something solid to secure it to.
- Secure the suspension trainer to the top of a door frame or a squat rack. Adjust the handles to an appropriate length.
- Grab the handles with a neutral or pronated grip.
- Brace your core and glutes, then lean back based on your strength level and extend your arms. Only your heels should touch the ground, and your body should stay in a straight line throughout the movement.
- Take a deep breath, retract and depress your shoulder blades, then pull yourself up by driving your elbows back and down.
- Once you feel a strong contraction in your back, pause for 1-2 seconds.
- Return to the starting position by slowly extending your arms and relaxing your shoulder blades.
- You should feel a stretch in your back at the bottom of the rep. Repeat for the desired number of repetitions, squeezing your back at the top of each one.
To see how to perform a suspension trainer row properly, watch the video from Breaking Muscle below.

Tips for Suspension Trainer Rows
- The more upright you stand, the easier the row, and vice versa.
- Keep your body in line by tightening your core and glutes.
- Focus on driving back with your elbows to limit bicep involvement.
8. Meadows Row
When to Perform the Meadows Row
The Meadows row is a single-arm landmine row made famous by the late IFBB pro bodybuilder and coach John “Mountain Dog” Meadows. It lets you train heavy without frying your lower back and core.
It hammers the upper back and lower lat, an area most horizontal rows struggle to reach. So if your upper back is lagging, you want to bring up your lower lats, or you’re fixing an imbalance, it’s a great bent-over row alternative. Start with your weaker arm and match the weight and reps on the stronger side.
Do it early in your back or upper-body session. A landmine is ideal, but wedging one end of the barbell into the corner of a squat rack or a wall works fine.
How to Perform the Meadows Row
- To do this exercise, you’ll need an Olympic barbell, Olympic plates, and a landmine.
- Place one end of the barbell in the landmine and load an appropriate amount of weight on the other end.
- Stand to one side of the barbell with a staggered stance. The front foot should be horizontal to the landmine.
- Push your hips back, slightly bend your knees, and lean forward to grab the end of the barbell with your right hand using an overhand (pronated) grip.
- Rest your left forearm just above the knee on your front (left) leg for more support.
- Take a deep breath, brace your core, and begin the movement by driving your right elbow behind you while retracting your shoulder blade.
- At the top of the rep, pause for 1-2 seconds and focus on squeezing your back.
- Slowly return the bar to the starting position by extending your arm and protracting your shoulder blade.
- Once you feel a stretch at the bottom, repeat for the desired number of repetitions.
In the video below, the man himself, John “Mountain Dog” Meadows, demonstrates how to perform the Meadows row.

Tips for the Meadows Row
- A landmine setup works best, but you can also wedge one end of the barbell into the corner of a wall or squat rack.
- Start with your weaker arm and match the weight and reps on your stronger arm.
- Wear a lifting belt to help with bracing and core stability.
9. Band Rows
When to Perform Band Rows
Resistance bands are some of the most useful gear you can own, especially on the road. They’re light, cheap, and easy to toss in a suitcase, so if your equipment is limited, band rows make a solid bent-over row alternative.
Want more resistance? Grab a thicker band or step further from the anchor. You can also row one arm at a time instead of both.
Band rows are also a great rehab and priming exercise since you stay upright, and they’re a good way to groove your shoulder-blade mechanics before heavier work. If you’ve got access to cables, a seated cable row hits much the same way.
Run them anywhere in a back or upper-body workout.
How to Perform Band Rows
- To do this exercise, you’ll need a thicker resistance band and something to secure it to, such as a pole, door frame, support beam, or squat rack.
- Secure the band to a support beam so you can grab both ends.
- Grab each end of the band with a neutral grip.
- Take a few steps back, extend your arms forward, and bend down into a half-squatting position.
- Take a deep breath, brace your core, pull your shoulder blades down and back, then drive your elbows backward.
- Once you feel a strong contraction in your back, pause for 1-2 seconds.
- Exhale as you slowly return your arms to the starting position by extending them.
- Repeat for the desired number of repetitions.
Live Lean TV walks through how to perform a resistance band bent-over row in the video below.

Tips for Band Rows
- Focus on pulling your shoulder blades down and back.
- The farther you stand from the anchor, the harder the exercise.
- It also makes a great warm-up for bigger compound back exercises.
10. Lat Pulldowns
When to Perform Lat Pulldowns
The bent-over row trains the lats, so I wanted to close the list with an exercise that goes after them more directly. The lat pulldown is a vertical pull, much like a pull-up, and it pairs perfectly with a horizontal row like the barbell or dumbbell row.
If your back is short on width, pulldowns will do more for you than another barbell row. They put little to no strain on your lower back, clean up your scapular control, and hit the lats as well as anything out there. For the full picture, see our guide to the lat pulldown benefits and muscles worked.
You can run them with all sorts of attachments, so try a few and see what feels best. The cable keeps constant tension on your back, which your muscles love for growth. Do them early in a back or upper-body day, and if there’s no pulldown station free, pull-ups get the job done. Want more options? Check our lat pulldown alternatives.
How to Perform Lat Pulldowns
- To do this exercise, you’ll need a lat pulldown cable machine and a lat pulldown bar.
- Attach the lat pulldown bar to the cable, then adjust the seat or support pads so your feet are flat on the ground and secured. They shouldn’t be able to move up and down.
- Select an appropriate amount of weight. Sit down, secure your knees under the support pads, and plant your feet firmly on the ground.
- Reach up and grab the lat pulldown bar with a pronated grip just outside shoulder width.
- Take a deep breath, pull your shoulder blades down and back, then pull the bar toward the top of your chest by driving with your elbows. It’s okay to lean back slightly during this part of the movement.
- At the bottom of the rep, pause for 1-2 seconds, then return to the starting position by extending your arms and leaning forward.
- Repeat for the desired number of repetitions.
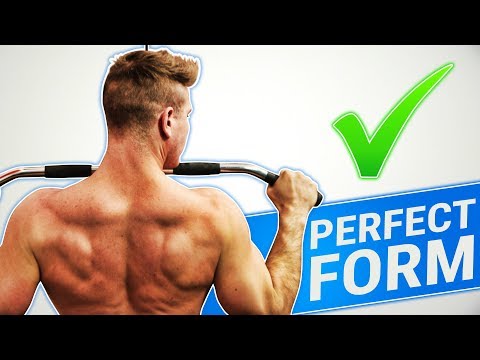
Watch the video below from Scott Herman to see how to perform a lat pulldown properly, plus three golden rules to put into practice.
Tips for Lat Pulldowns
- Use a thumbless grip to take the forearms out of the movement.
- Experiment with different attachments and grip widths to see what feels best.
- Focus on depressing and retracting your scapula as you pull the bar toward the top of your chest.
Reasons to Choose a Bent-Over Row Alternative
The bent-over row is a great free-weight back builder. It works a ton of muscle at once, mostly your mid and lower back, needs barely any equipment, and takes to progressive overload well.
Where it falls short is for lifters dealing with lower-back pain or injury, a side-to-side imbalance, no barbell, or a specific weak point. If your lats are the thing lagging, a lat pulldown does more for them than a row ever will.
If your lower back or core quits before your upper back on a barbell row, a chest-supported row will serve you better. And without a barbell, the lift simply isn’t an option.
The good news is the bent-over row was never mandatory for a strong, full back. There are plenty of back exercises worth trying, so rotate through a few and keep the ones you connect with.
Muscles Worked by the Bent-Over Row
The bent-over row primarily works the rhomboids, trapezius, teres minor, teres major, infraspinatus, and latissimus dorsi. Secondarily, it engages the biceps, forearms, erectors, glutes, core, and hamstrings.
Primary Muscles
- Rhomboids
- Teres Major
- Teres Minor
- Infraspinatus
- Trapezius
- Upper fibers
- Middle fibers
- Latissimus dorsi
Secondary Muscles
- Biceps
- Biceps brachii (long & short head)
- Brachialis
- Forearms
- Hamstrings
- Biceps femoris
- Semitendinosus
- Semimembranosus
- Erectors
- Glutes
- Gluteus maximus
- Core
Bent-Over Row Alternatives: FAQs
What’s the best barbell row alternative?
It depends on why you’re swapping. For the closest carryover, the T-bar row and Pendlay row keep the same hinged, barbell-loaded pattern with a bit less lower-back stress. If your back is fine but your equipment is limited, an inverted row or band row covers you.
What’s the best bent over row machine alternative?
The chest-supported machine row is the obvious one, since the pad takes your lower back and core out of it and lets your upper back do the work. A lat pulldown is the other strong machine option, especially if you’re chasing back width rather than thickness.
What’s the best dumbbell bent over row alternative?
The single-arm dumbbell row is my top pick. It evens out imbalances, spares your lower back, and only needs one dumbbell. If you want even less lower-back involvement, an incline dumbbell row with your chest braced on a bench is the way to go.
Do bent-over rows build width or thickness?
Mostly thickness. The bent-over row hits the lats, but as a horizontal pull it builds back density more than width. For width, you want a vertical pull like a lat pulldown or pull-up. Ideally you train both.
Are bent-over rows necessary?
No. They’re effective, but plenty of lifters have built serious backs without ever doing one. As long as you’re rowing with good technique and adding weight over time, your back will grow. Try a handful of these and keep what works.
Key Takeaways
Match the alternative to why you’re leaving the barbell row behind. Bad lower back? The chest-supported machine row and incline dumbbell row keep your spine out of it. Fixing an imbalance? Single-arm dumbbell rows and the Meadows row let your weak side set the pace. Training at home or traveling? Inverted rows, band rows, and suspension trainer rows need almost nothing. Chasing back width instead of thickness? Lat pulldowns beat any row for that. You don’t need all 10. Pick two or three that fit your equipment and your weak points, then add weight over time.
Other Alternative Exercises
If you enjoyed this post, check out our other roundups of the best alternatives for other exercises.